Creating a landing page has never been easier – and more measurable – than when using HubSpot's landing page creator.
They've taken the mystery out of both laying out and designing an effective landing page. However, many marketers and business owners are simply too busy running day-to-day operations to actually take the time to figure out how create one.
Worry not, as we've thoroughly outlined the process here.
Creating a Landing Page in HubSpot
1. Getting Started
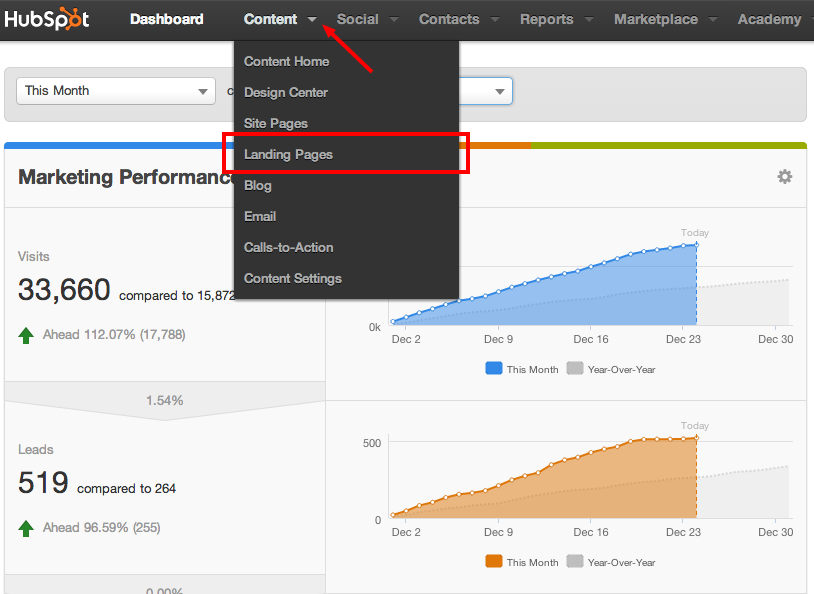
Once you've successfully logged in to your HubSpot Dashboard, locate the "Content" pull down menu and click "Landing Pages" to get started.
From there, you'll be directed to your catalogue of current landing pages. If you haven't created any, obviously there won't be much here to see. (That's why it's time to get started!)
2. Create A New Landing Page
To create a new page, simply click the blue "Create a new page" button on the top right of your screen.
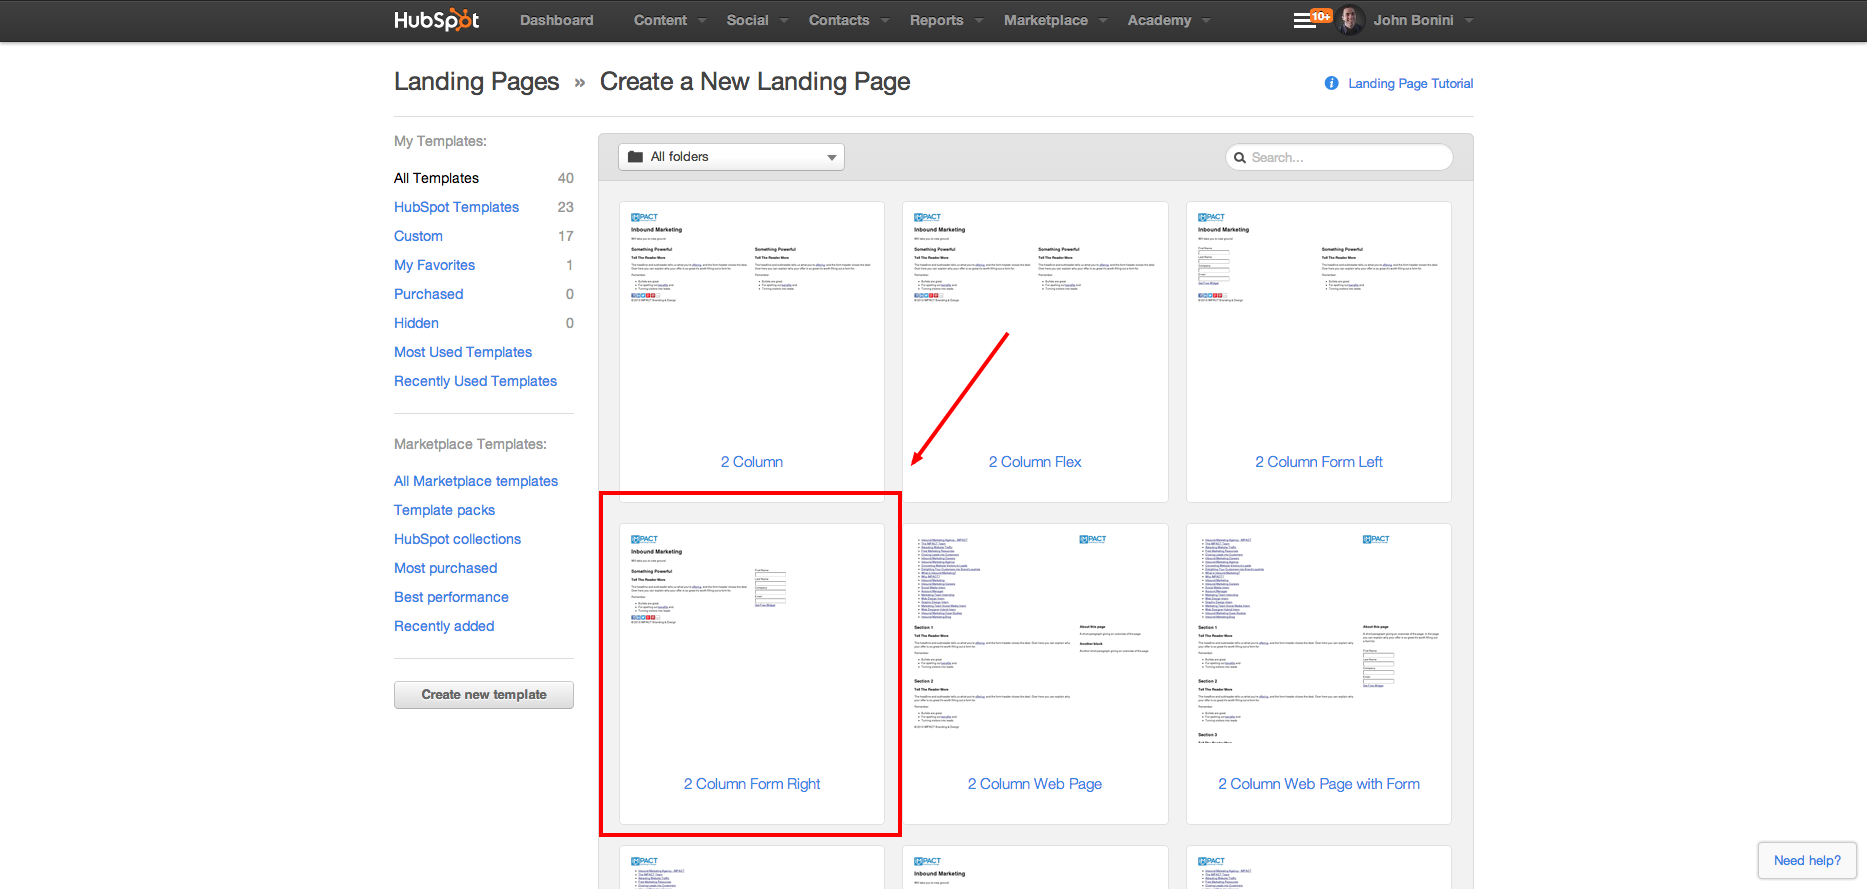
This will open a library of templates to choose from. While there are certainly many options, to start out it's recommended that you choose the "2 Column Form Right" template, as this is a fairly standard layout that'll get the job done.
3. Landing Page Content
Once you've chosen your template, it's time to get started in creating the landing page content that will actually generate conversions.
You'll be starting with a blank template with some filler text, so it'll be up to you to plan out the language and content that most resonates with your audience.
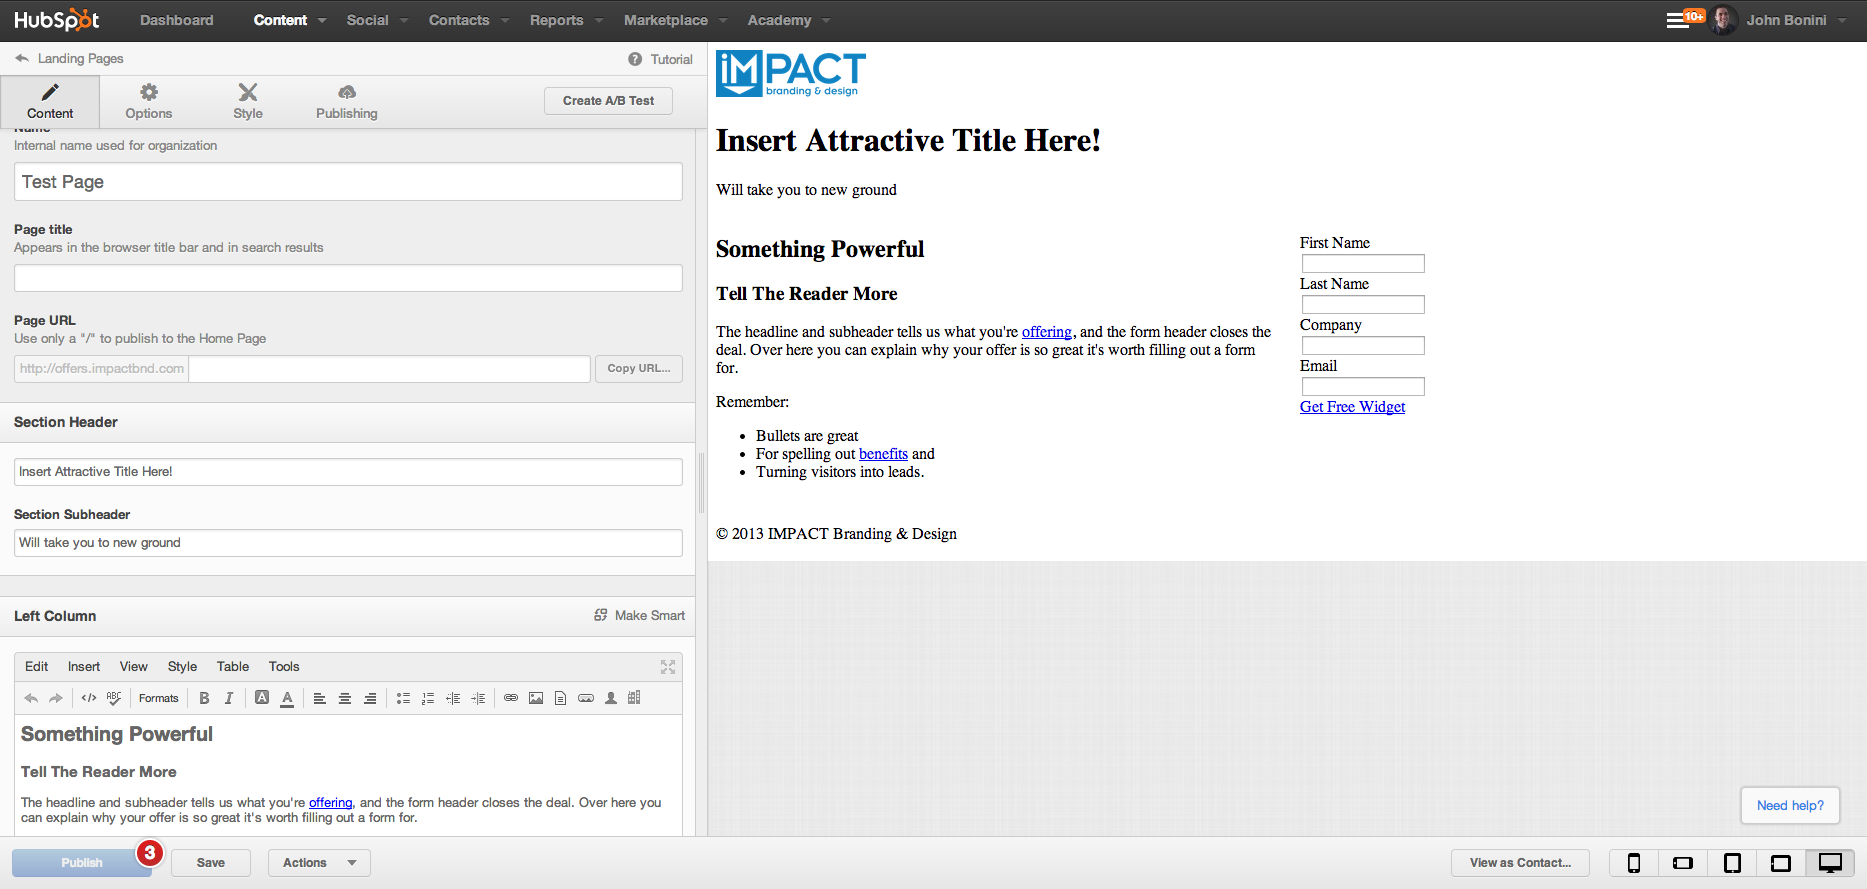
In the landing page editor, the screen will be split among two sides. The left side of your screen will be the actual editor for making changes on the page, while the right side of the page is simply a preview of how your page will look once published. (See below.)
The content fields are all pretty self explanatory, so the focus here should be about creating actionable content that conveys the value of your offer quickly.
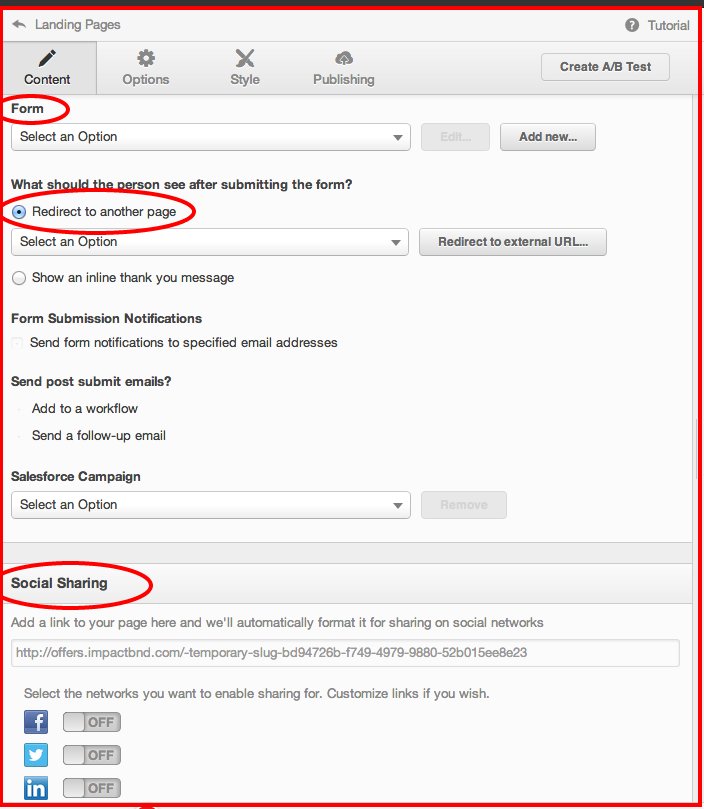
For SEO purposes, be sure that your page title, section headers, and page URL all contain the keyword(s) you're trying to rank for. Where things may get a little confusing is toward the bottom half of the page editor, which includes form, redirect, and social sharing options.
- Form – Choose the requisite lead capture form to be included on your landing page. This may vary depending on the complexity of the offer. For instance, if it's a simple how-to offer, you probably won't get too granular in the fields you require. However, if it's a consultation form of some sort, you'd want to ask things like phone number or other geographic information.
- Redirect – Once a lead fills out the form on the landing page (yay!) you'll want to redirect them to a Thank You Page so they can download the actual offer.
- Social Sharing – Wouldn't it be awesome if visitors of this landing page could share it with their social networks? Well, they can! Once the page URL has been created, simply turn all the switches for each social network to "On" and all the work will be done for you.
4. Finishing Touches
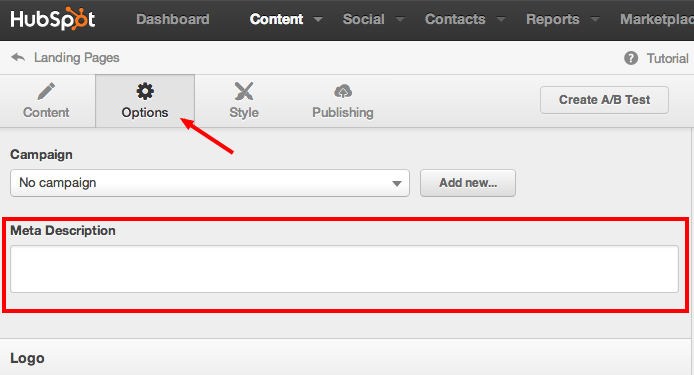
Once you've finished the content for your landing page, there's just a few things left before you hit the publish button. Click the "Options" tab on the landing page editor to be directed to the area to edit the "meta description," which is the brief snippet that shows up in search results to inform users what the page is about.
Once again, make sure you include any relevant keyword(s) in the meta description for SEO purposes.
Publishing
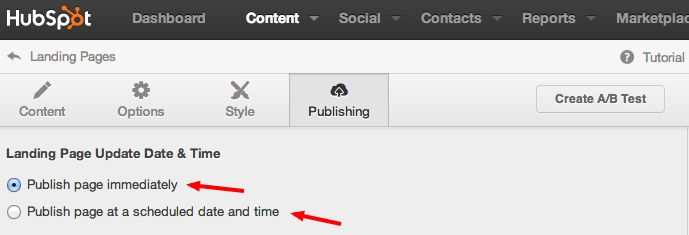
You'll have two options for actually publishing the landing page once it's complete. You can publish the page immediately, or you can schedule the page to be published at a specific date and time.
Bonus tip: Notice at the top right of the image above there's a button that says "Create A/B Test." If you're undecided about the specific content on the page, such as headers, page title, or the overall content in general, you can use this button to create separate variations of the page in order to monitor which one performs better.
Publish Your Page
Congratulations, you just created a landing page in HubSpot!
Make sure you're regularly checking back in your landing page library in order to monitor performance and make any necessary changes.
Want more help? Take a look at our list of 44 great examples of landing pages!
Free Assessment:


